 My children love to cook, and I have been trying very hard to teach them what I know and help them become involved in the process. One thing that I have noticed is that by taking the time to teach them, it has also changed how they think about food in general. We live in the country and have a large garden. My goal this year is to can as much from our garden as possible. So far, we have canned our cucumbers into Kosher Dill Pickle Spears and chips, as well as making spaghetti sauce with all of the abundant and ripe Roma and Celebrity tomatoes! We also plan to can our tomatoes whole.
My parents had a bumper crop of plums so my daughter and I sat down and made some Plum Jam and I ended up having a really enjoyable afternoon with her.She was so cute!!! She wanted her hair braided so she would look like Anne of Green Gables.

 (Ignore the sheets on my windows, I'm saving up for the draperies I want) :)
How to make Plum Jam
(Adapted and changed slightly from Ball Original Fruit Pectin recipe)
1. Clean and sterilize your jars. Prepare the jars by heating your jars and lids in hot water, not boiling, until ready to use. Keeping the jars hot prevents them from breaking when the hot jam or jelly is added.
2.Wash and clean your plums in cold water and make sure that you get the stems or any unwanted guests in your jam, like ants.
3. Pit your plums and cut them up into small chunks.

4. Put them on the stove in a 6 or 8 quart saucepan, that is preferably stainless steel. Gradually add in Fruit Pectin. Add up to 1/2 tsp butter or margarine to reduce the foaming. (It is your secret ingredient). Bring mixture to a full rolling boil that cannot be stirred down, over high heat, stirring constantly. Add 3 Cups of sugar, stirring to dissolve. (The Ball recipe calls for 8, so if you want it sweeter, go for it.)
5. Return mixture to a full rolling boil. Boil hard for 1 minute, stirring constantly. Remove from heat. Skim foam if necessary.

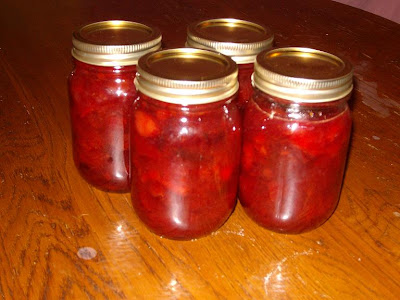
 6. Ladle the hot jam into the hot jars, one at a time, leaving 1/4 inch head space. Clean rim and threads of the jars using a clean, damp cloth to remove any residue. Center hot lids on the jars, allowing sealing compound to come in contact with the jar rim. Apply bands and adjust until fit is fingertip tight.
 7.Place filled jars in canner. Be sure water covers tops of jars by 1 to 2 inches. Add hot water if necessary. Place lid on canner. Bring water to a gentle steady boil. Process for 10 minutes. After processing is complete turn off the heat and remove lid. Let jars stand for 5 minutes.
8. Remove jars from the canner and set upright on a towel to cool, undisturbed for 24 hours. Bands should not be retightened as this may interfere with the sealing process. After cooling, test seals by pressing the center of each lid. If a lid is not sealed within 24 hours, refrigerate immediately for up to 3 weeks or reprocess for the full length of time using a new lid.
9. Clean sealed jars. Remove the bands. Wipe jars and lids with a clean, damp cloth. Label and store in a cool, dry, dark place for up to a year. Enjoy!
No comments:
Post a Comment